Archive for hormagaunts

Dynamic Models

Posted in The Hobby: Painting, Modeling, Basing with tags , , , , , , , on April 13, 2013 by Dylan Charles

I’ve been enjoying building my Tyranid army a lot more than my first Imperial Guard army. The models for the ‘nids are, for the most part, much more pose-able and expressive than a grunt with a gun (Oh look! His gun is pointing slightly to the left!).

I especially love the genestealer model. They’re extremely expressive and have a lot of individual personality. The four arms gives a lot of opportunities for a wide range of gestures and motions. I went to a lot of trouble to insure that none of my ‘gaunts or genestealers are standing in the same way.

This is part of the reason why my gargoyle squad was so disappointing to put together. There are only five different positions available for the wings and three of those positions look almost identical, so you have 6 out of the squad with their wings pointing forward.

It’s for this reason that, more than ever, I want to start messing around with conversions and green stuff. The tools are out there to take these models and do some really interesting things. I’m not ready yet to really start converting and I’m more interested in focusing on getting my painting skills up to acceptable levels, but ideas are starting to percolate about what I want to do for things like the gargoyle squad and their inflexible wings.

-D-

Rough and Dirty Painting Guide: Hormagaunt

Posted in The Hobby: Painting, Modeling, Basing with tags , , , , , , , , , , on April 7, 2013 by Dylan Charles

After long last, I have finally put together a painting guide for the hormagaunts. If you liked the earlier pictures that I posted of my ‘gaunts, here’s how you can get similar effects.

A few words before we begin. These ‘gaunts represent the first nids I’ve ever painted. They don’t look great. You will never see these in Games Workshop’s codex of awesome painting jobs. I still have a long way to go before I feel my skill is up to what is in my head. But that’s what the blog is about: it’s about learning as we go. I’m going to try and post all of my mistakes and missteps along the way so you can avoid them.

Secondly, I need a better camera area set-up. The light is not great to get all the colors I wanted you to see. All the photos of the feathering did not come out, so I’ll just do my best to describe the process without a pictorial history. You’ll live.

Moving on!

IMG_5471


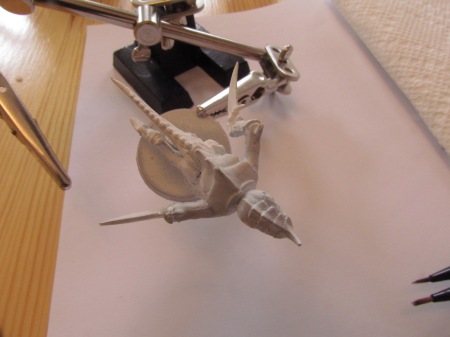
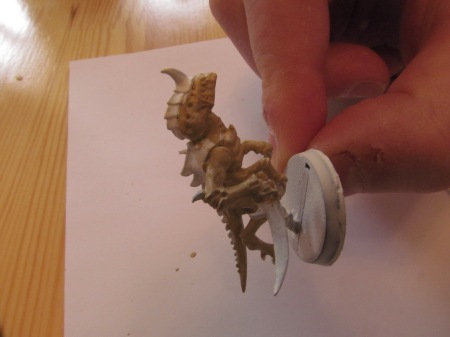
This is the hormagaunt, primed and ready to go. I use GW’s primer, because I’m lazy and I’d rather buy primer at the game store than go to the hardware store. You should go to the hardware store. You can find white spray paint primer for under ten bucks.

For my painting set up, I always have a paper towel on hand to wipe off excess paint for dry brushing and wet brushing. The white paper is there because I was using the kitchen table and not my usual desk and I didn’t want to be straight up murdered for getting bleached bone on the good furniture.

I also don’t use GW’s brushes because they don’t have the range of styles I feel are needed for getting the effects you need. I have a friend who has a brush that is just a single bristle that he made himself. He uses it for eyes. You need more than what GW can provide, but you don’t have to break the bank for it. Go to Michael’s and poke around.

IMG_5479


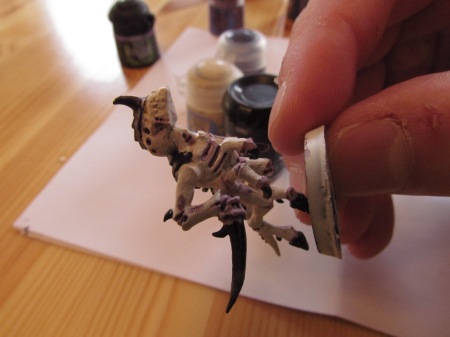
Here’s Hormie after I applied a layer of Ushabti Bone (Bleached Bone) on everything that wasn’t claw or carapace. At this stage, you can be sloppy. Do it fast and do it dirty. You will very rapidly cover up any and all of your mistakes in the later stages.

IMG_5483


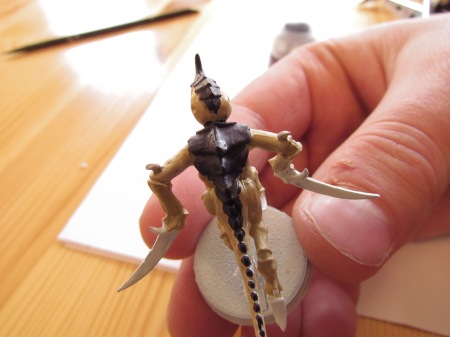
Next, I painted the carapace on the body and head with Naggaroth Night. Now it’s time to be more careful. It’ll be hard to cover any mistakes with the White Scar (Skull White) if you get dark purple on the body.

IMG_5490


Next, I painted the claws and hooves black. I’ve tried using purple in the past and I ended up liking the more striking effect of the black claws. Personal preference.

IMG_5494


Next, I used a very thin layer of White Scar (Skull White). You want a little bit of the Ushabti Bone (Bleached Bone) to show through. If he’s just solid white, it’s going to be visually less interesting. How much white you use is, again, personal preference.

IMG_5499


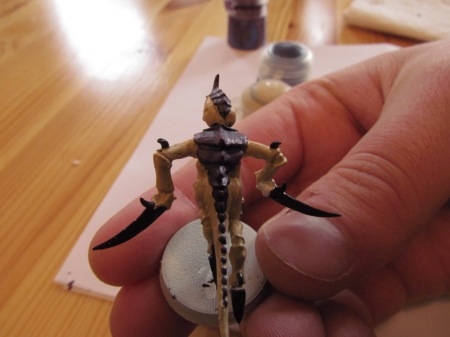
Next I applied the wash. I used Druchii Violet (Leviathan Purple) in the various cracks and crevices on the ‘nid. There are a lot of places you can use the wash and the more you highlight, the better it looks. Don’t worry if you spill outside of the areas you meant to put it (like I did on the ribs and just above the elbow), that’s what dry brushing is for.

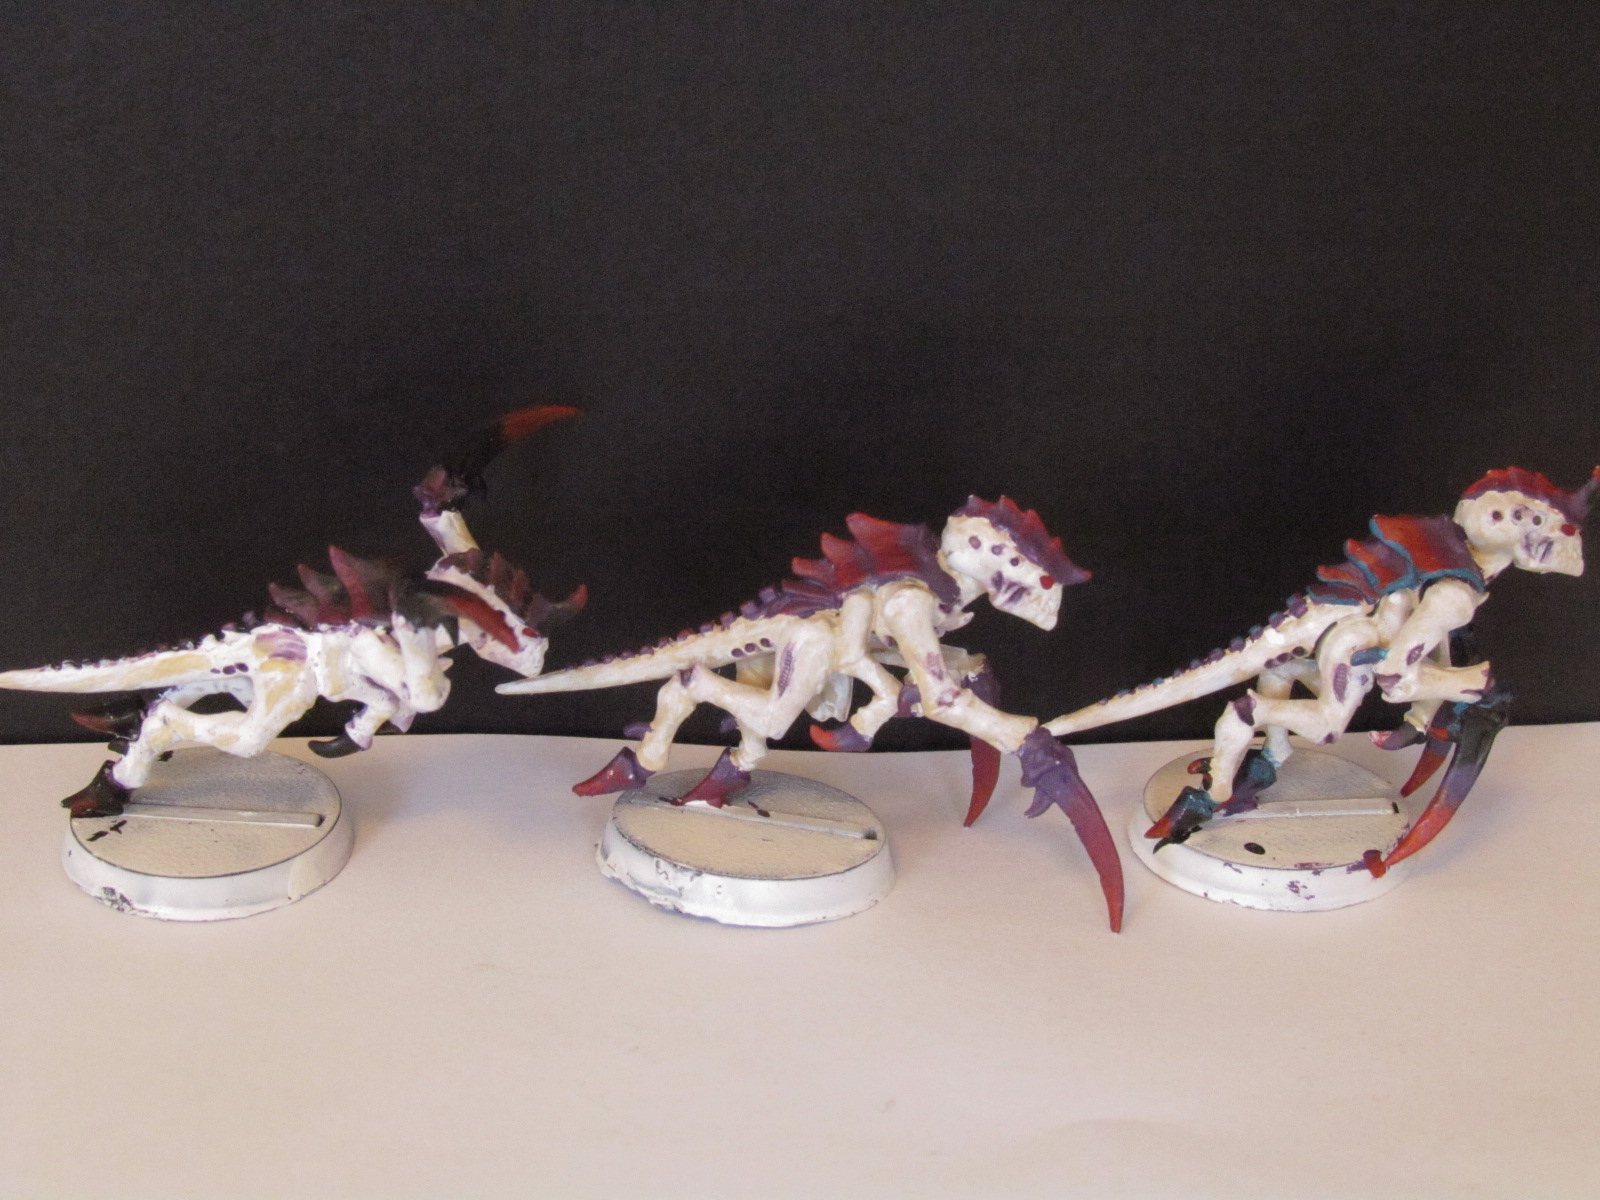
Now, while I was doing these other steps, I was feathering. Here’s the video I used  when I was teaching myself. One of the most important things to remember about this technique is that COLORS MATTER. If there is too big of a difference between the colors your are trying to blend, it will never look blended. It will pop too much and you’ll lose the effect you were going for. I used a base layer of Naggaroth Night, then Xereus Purple (Liche Purple), then Kantor Blue (Necron Abyss).

IMG_5503


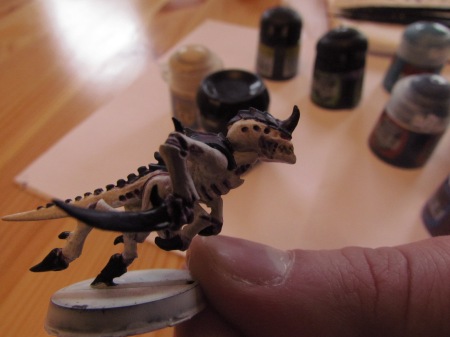
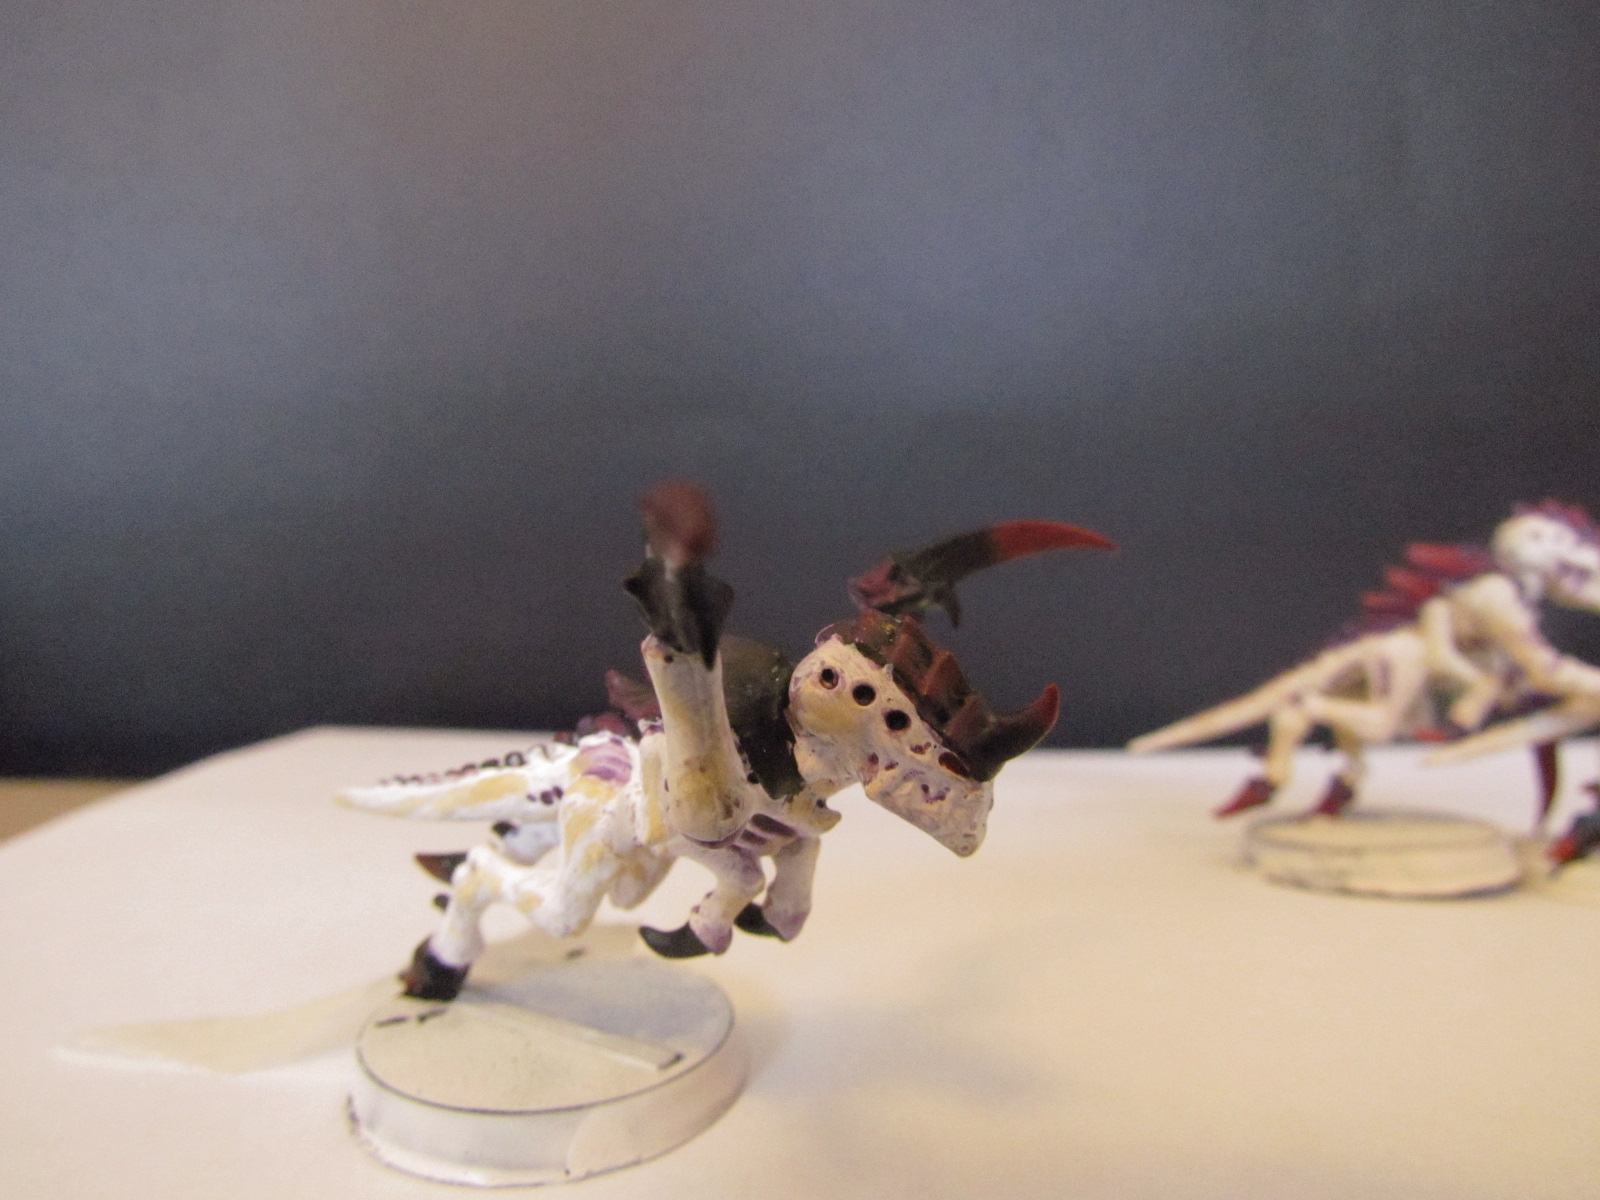
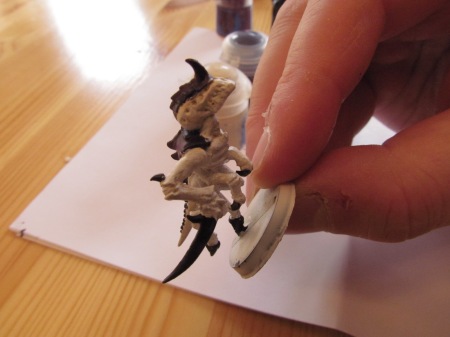
After adding two layers of wash in the crevices and washing the carapace (to help blend the colors and bring out details that might otherwise be lost in the paint), I began to hit the small details. I used a red (you have your druthers on red, I rarely stick to one for ‘nid eyes.) on the eyes. I trimmed the edged of the armor in Sotek Green (Hawk Turquoise) and dry brushed white over the areas I washed to help neaten it up.

Dry brushing is what it sounds like. Take your brush and wipe off a lot of the paint. Then lightly brush over the areas. This will only paint the most raised areas of the model and ignore the deeper recesses. This is also a good method for vehicle painting when you want to show wear and tear.

I also used Agrax Earthshade (Devlan Mud) to highlight the teeth. This, bar none, is the best wash for the teeth. Don’t try the others. Use Devlan Mud.

I also dry brushed a layer of Kantor Blue (Necron Abyss) onto the claws. I’ve been experimenting with different colors to highlight onto the claws. Dark reds and purples look best.

IMG_5504


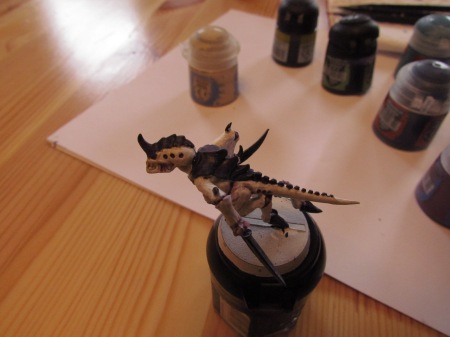
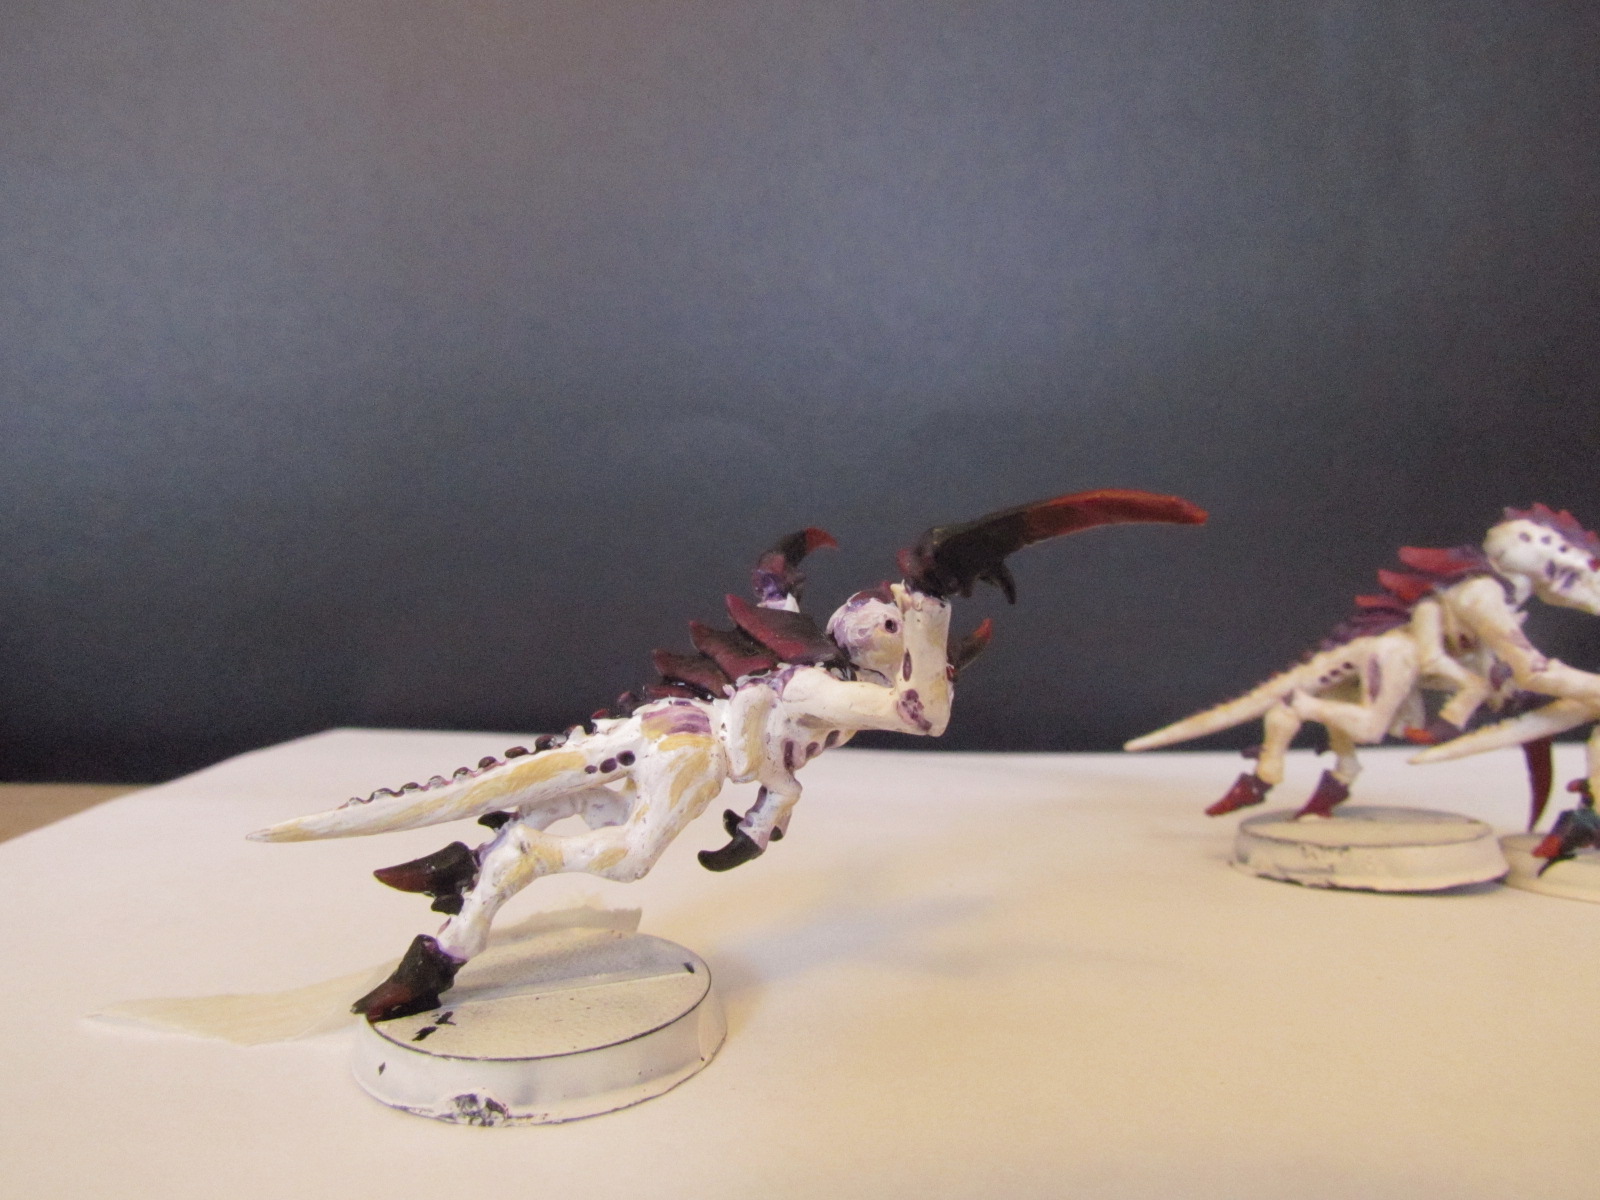
And that’s the finished hormie. For your troop choices, this is the most work you should spend painting and even that might be too much painting. I did all of those steps for twelve models and it took three weeks.

Next week, I’ll be researching basing!

-D-

Hobby Priorities

Posted in The Hobby: Painting, Modeling, Basing with tags , , , , , , , , on April 7, 2013 by Dylan Charles

So it’s been a week or two (or three) but I’m back. It turns out bronchitis, a wedding and nine hour work days do not leave a lot of time for a new hobby. Don’t get me wrong, I’ve steadily been building genestealers and painting hormagaunts, but my options were either to work on modeling or write in the blog about modeling and, of the two, I’d rather do the former.

So this is just a quick update before life intervenes again.

I’m more of less done with my hormagaunts, at least as far as painting is concerned. I still need to demonstrate how I’ve been feathering, like I promised, so I’ve saved one lone gaunt to demonstrate. All in all, I’m satisfied with how they came out, but they’re not perfect. I’m not sure how much of that is I need to practice my technique or work on my color palette. Probably both.

I also now have a fully assembled set of genestealers. In the past, I never filed down the mold lines or did much prep work prior to painting. This time I went to the trouble to carefully remove all of the mold lines and remove that extra fringe of plastic that crops up on occasion. It took me an hour to build a single genestealer, but I think it’s worth it.

In terms of the hobby in general, I think I’ve come a long way from the days when I was building Catachan warriors. Of course, at this rate, I’ll have enough troops to play a game by the time 2016 rolls around.

Next up, hopefully, a step-by-step tyranid painting guide and army building.

-D-

‘nid Test Cases

Posted in The Hobby: Painting, Modeling, Basing with tags , , , , , , , , , on March 17, 2013 by Dylan Charles

I said a few days ago that I was going to post pictures of my first few attempts to paint the beginnings of my ‘nid army and I honestly meant to do that on Friday. The delay was due to my inability to grasp basic camera mechanics. After a few solid hours of hammering at the focus button, I finally managed to get a few decent shots of the first three hormagaunts I painted.

A quick note about this and other posts, I will always try to list the new name for paints and then the old name in parentheses after. For example; White Scar (Skull White). I do this because, if you’re like me, you probably own a couple of old paints that have the names from before the conversion and I want ya’ll to follow along as best as possible.

I’m not going to go into depth into the techniques I used here and now (that will be for a later post), but I will go over the ideas that I had for the painting and then the implementation. For me, I need to actually physically try something before I can decide if I like it or not. Which means my first hormagaunt is…not so good. he bore the brunt of my experimentation and while he’s acceptable, I would be embarrassed to have him stand next to the rest of my army.

Speaking of which…

First1


I made a few mistakes. Number one; never, ever dry brush a darker color onto a lighter color. That should have been obvious to me before I did that, but I went ahead and did it anyway. Instead of looking like mottled armor, which is what I was going for, it looks like a white ‘nid rolled in some spoiled mayo. Not good.

Number two, I love washes. Washes are how painters can achieve some truly awesome effects without a huge amount of effort. Except this was my first time using Druchi Violet (Leviathan Purple) and using White Scar (Skull White). So I did what I do when I use Agrax Earthshade (Devlan Mud) on my Cadians: I painted the nid entirely in the wash and he turned purple.

First2

Once again, not what I was going for. He looked bad. And he looked even worse when I went back and repainted him. He has way too much paint and he’s lost a lot of detail. I am honestly considering stripping the paint and starting again from scratch, at which point, you’ll get another tutorial about how to strip plastic miniatures.

In terms of style, I didn’t like the black carapace armor and claws. He looked too dark. The whole point is I want brightly colored Tyranids. I’m going for vivid, popping colors and this just wasn’t doing it for me.

Enter Test Number 2.

Second1


Learned my lesson the second time and reversed the base colors: a layer of Ushabti Bone (Bleached Bone) and then a layer or two of dry brushed White Scar (Skull White). Much better effect and I got exactly what I was looking for.

I was also smarter with the wash, using it much more sparingly, though I am going to go back and touch it up here and there. I left the models in their rough draft state so you have a better idea of what I did without everything being buried under touch-ups and highlights.

Second2


I also changed the color scheme with the claws and armor, removing the bottom layer of black and starting with Xereus Purple  (Liche Pruple) instead. I ended up not liking this look for the claws and returned to the earlier look. Still not enough color though and not enough pop. Leading to ‘nid test subject number 3….

Third1


The black claws are back and now there’s a trim of Sotek Green (Hawk Turquoise) on the carapace armor. At this point, I think I’ve locked in the colors I want to use for the entirety of my nid army. By working it out through these three, I can now move forward. I will probably tweak things here and there (like with the genestealers who lack a lot of the carapace armor), but, for the most part, I like how things look.

Now it’s about practicing two important techniques that I will really need to nail down for ‘nids especially: feathering and dry brushing.

FullTrio


Hope this helps other beginners in deciding how they want to paint their armies. Next week, I’m going to document the painting of a hormagaunt from beginning to end and talk about how I’m going to decide what goes into my army.

-D-

Keepin’ It WYSIWYG

Posted in On the Table: Army Building, Tactics and Strategies with tags , , , , , , , , , , , , , on March 15, 2013 by Dylan Charles

It has been so long since I’ve opened up a codex and actually sat down to read the rules, but it all came flooding back to me just how daunting it is to be confronted with all those pages of text and trying to figure out which units you want to take, with which pieces of wargear in how many units of which size.

The hormagaunts are easy in that they only come with two pieces of wargear. No need to choose, decision has been made for you in that regard. But with the genestealers (which I just picked up today at Pandemonium Books and Games {support your local store}) there are rending claws, adrenal glands, toxin sacs, and I-don’t-know-whats. And some of these can be shown on the model, so I need to make sure that the models are WYSIWYG.

When I built my first squad of Catachan troopers, I made them fun. There was Screaming Dan, the guy with the broken vox, so he ran screaming to communicate orders. There was Sideways Stan who held his flamer sideways because I needed him to hold the flamer in the wrong hand. There was Drama Queen Steve, who held the head of one of his fallen comrades. And so on.

But once I started building my Cadian squads, that all changed. Everyone model fell into line and nothing is out of order. Gone are the poses and weird antics and goofy shenanigans. WYSIWYG!

I want something in-between with my new Tyranid army. I want them to be able to take them about town and play games without some rules lawyer pointing out that none of my genestealers actually have venom sacs. But, as you’ll see with my hormagaunts once I steal my girlfriend’s camera, I’m doing my best to pose them and paint them in vivid and interesting ways. I want an army with personality and pizzazz that still follows the letter of the law. Yes, they will have reinforced chitin modeled correctly, but they will sparkle.

-D-